
Photography tips for even the most novice of cave shooters.
I have always loved photographs taken at Carlsbad Caverns in New Mexico. The huge spaces filled with stalactites and ethereal light have always brought out the explorer in me. Sadly I have been unable to make the trek, but here in Washington State, we have a great alternative for those willing to travel underground to capture great images.
Near Mount Saint Helens we have the Ape Caves, lava tubes that run from the mountain for miles. For those thinking that it might be weird to visit lava tubes of an “active” volcano, rest assured that these caves were cut, not during the last eruption in the 80’s, but hundreds of years ago when the Pugit Sound was a bit less populated.
On entering you will find yourself trekking into a dark, cool and multi-mile cave that is just crying out for artistic creation. Below are some tips that will help even the most novice of caving photographers shoot like a pro.
Bring what you need
You need to bring the kitchen sink. You don’t want to get a mile down and then find out you forgot some extra batteries in the car. Personally, I brought two camera bodies, two speed-lights, a couple of wide-angle lenses, tripod, extra batteries, cable release (very important), cleaning cloths and other miscellaneous equipment.
Keep your arms free
The cave can be slippery and of course, is not stable so make sure your arms are free to balance. Shoulder bags could be a big problem here as they would throw you off balance. I would recommend a Lowepro camera belt system as I use or some sort of backpack for your equipment.
Increase your ISO
You might think you should set your ISO to 3200 to get a good image but we want to balance the amount of light with the quality of the final product. The higher the ISO the grainier the image and the less you will be able to do with it once you are done. I found that an ISO of 800 worked just fine. It was a good balance between quality and sensitivity.
Don’t get out of your depth
My first thought in such dark lighting condition was to open my camera aperture all the way but then I realized that it might result in a shallow depth of field that could affect the image and not give me the detail on the cave walls I was looking for. Here I chose to set my F-stop at F11 to give me a good balance between depth and light.
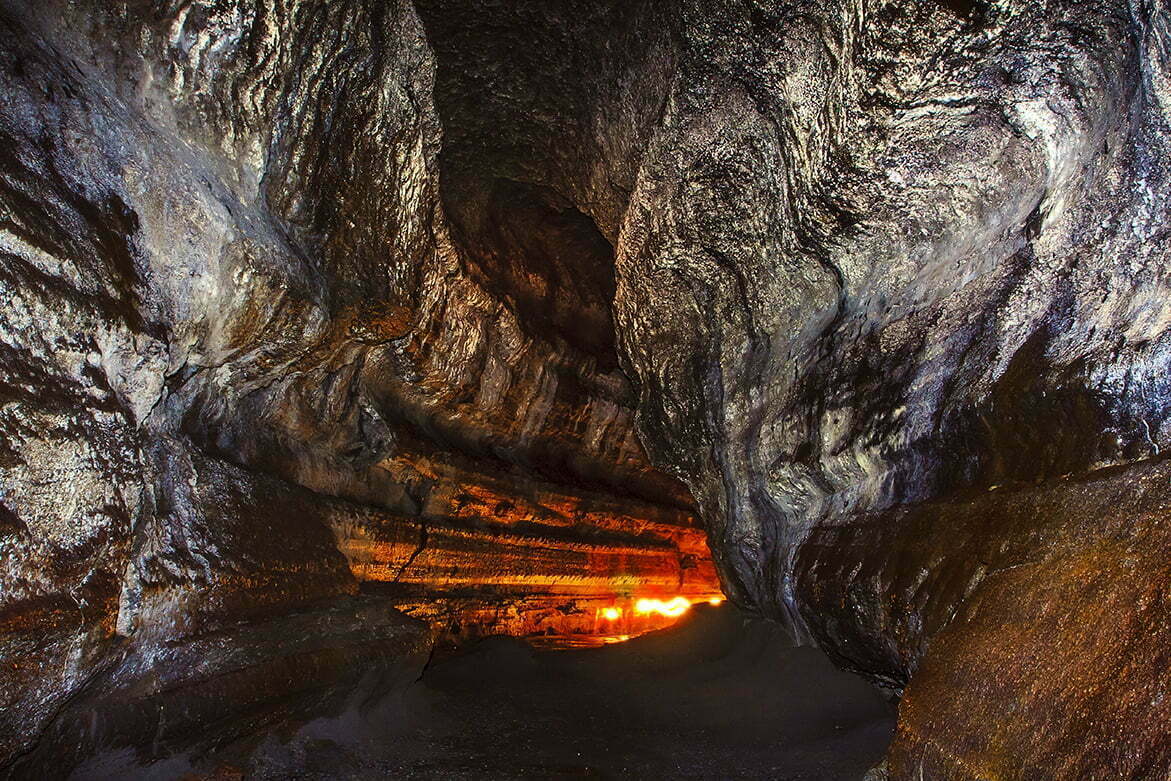
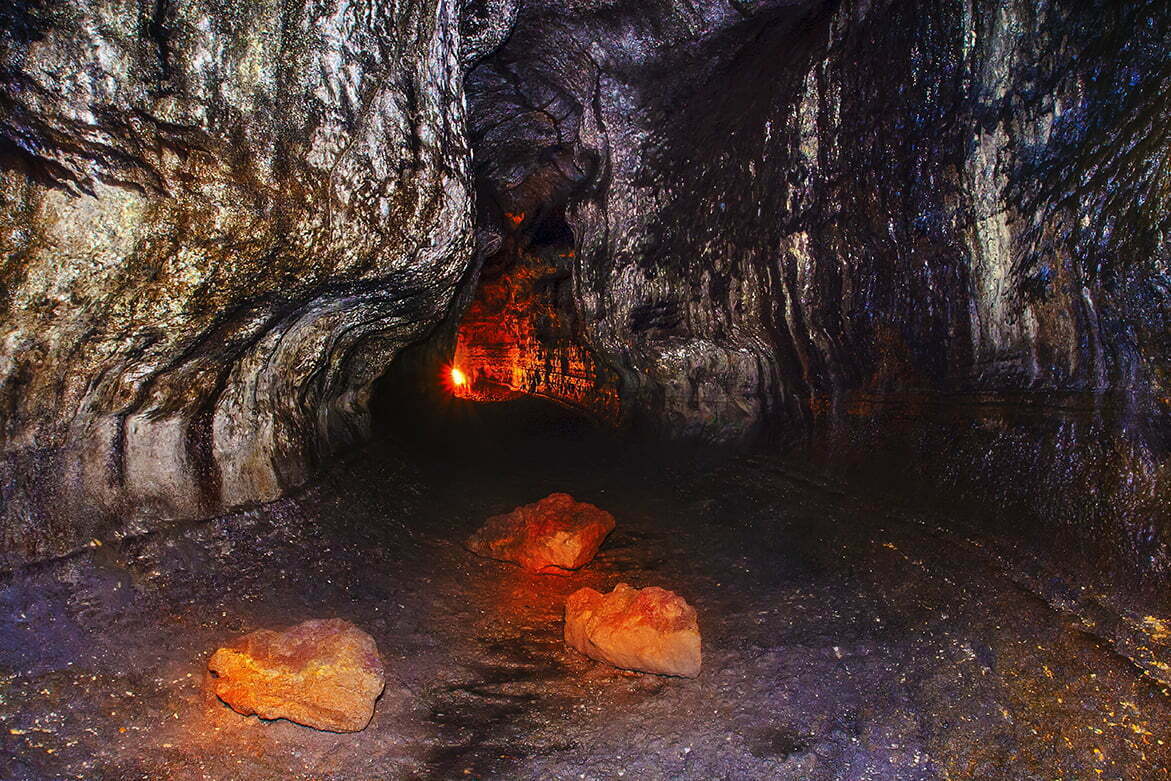 Wait in the dark for “light”
Once I had my tripod and camera ready, composed my image, attached a speed-light, set my ISO to 800 and set the aperture for F11, I placed the last part of my plan into action… I waited for the light.
I decided that since these caves did not have any light to help distinguish features around me, it’s hard to pick out detail in total darkness, I decided that the best thing to do would be to wait for other cave explorers with lanterns and flashlights to come by and help me illuminate things.
Even with the speed-light I had and my own flashlights, I could only record a slight amount of information, so I decided to listen and wait for other explorers. When I felt that they were just around the corner I would trip the shutter and my speed-light would fire. I would then take the next two minutes of the exposure and “paint” the walls with my flashlights. As well, because the exposure was so long folks would walk past me, their lanterns and flashlights illuminating the walls of the cave as the went down the passageway.
Because they were moving so quickly and the length of exposure was so long they wouldn’t be seen in the final image and in this way I was able to get light down every point of the tunnel.
Practice might make perfection
Now, I have a few images here that turned out amazing but I also have many more that didn’t turn out at all or looked terrible. This type of photography is a trial and error process with the emphasis many times on error. However, with enough and time and light deprivation, you just might find perfection.
Keep chasing the light.
~ Jonathan McIntyre